TFVC Execution
The following steps are specific to TFVC destinations and are performed after the session has completed.Enable Branch Visualization
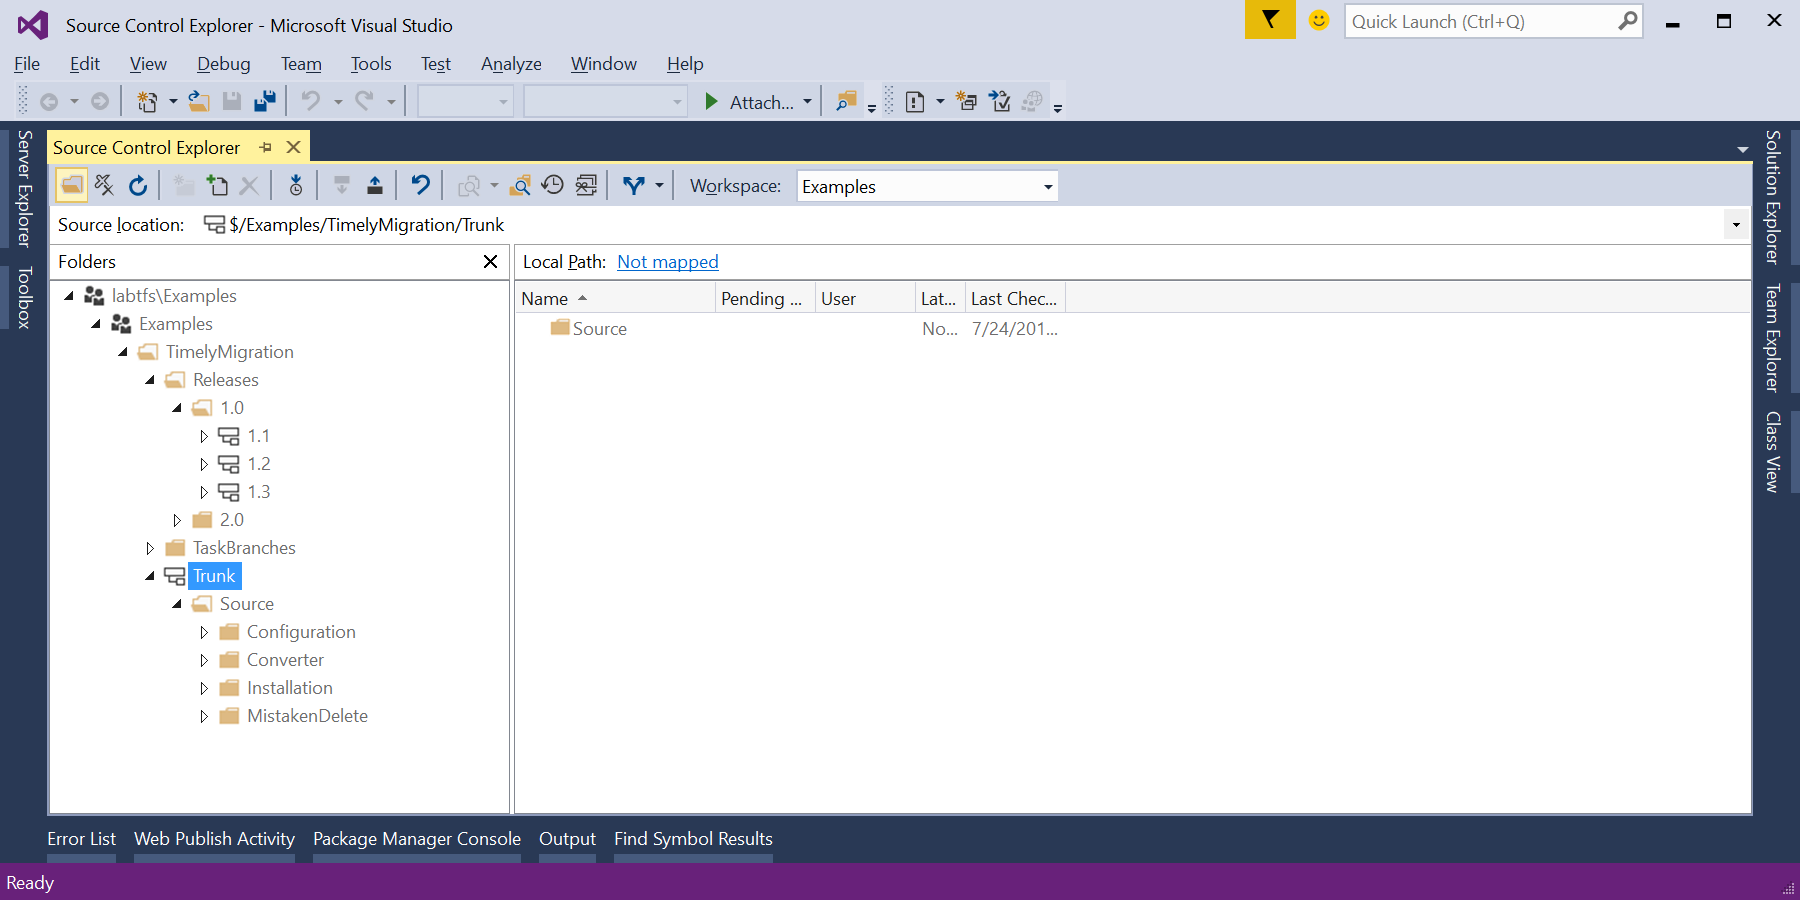
TFVC Branch Visualization is typically indicated by the special folder icon in the TFVC UI is different from file and folder level branch relationships. Branch Visualization lets you track a changeset and where it has been merged to and is initiated from a History window as opposed to merging by selecting files or folders. Branch Visualization adds more restrictions on what operations can be performed between branches which can cause problems with certain change combinations that might be migrated over. Because of the restrictions, enabling Branch Visualization is left as a step that is performed in the TFVC UI after finishing all migrations into the destination source tree. This can be performed by going to the Source Control Explorer window, selecting the folder for trunk, right clicking on it and selecting "Branching and Merging -> Convert To Branch".
Validating Results
This section aims to provide some common examples of what to look for to see how the migration went.
Tip Comparisons
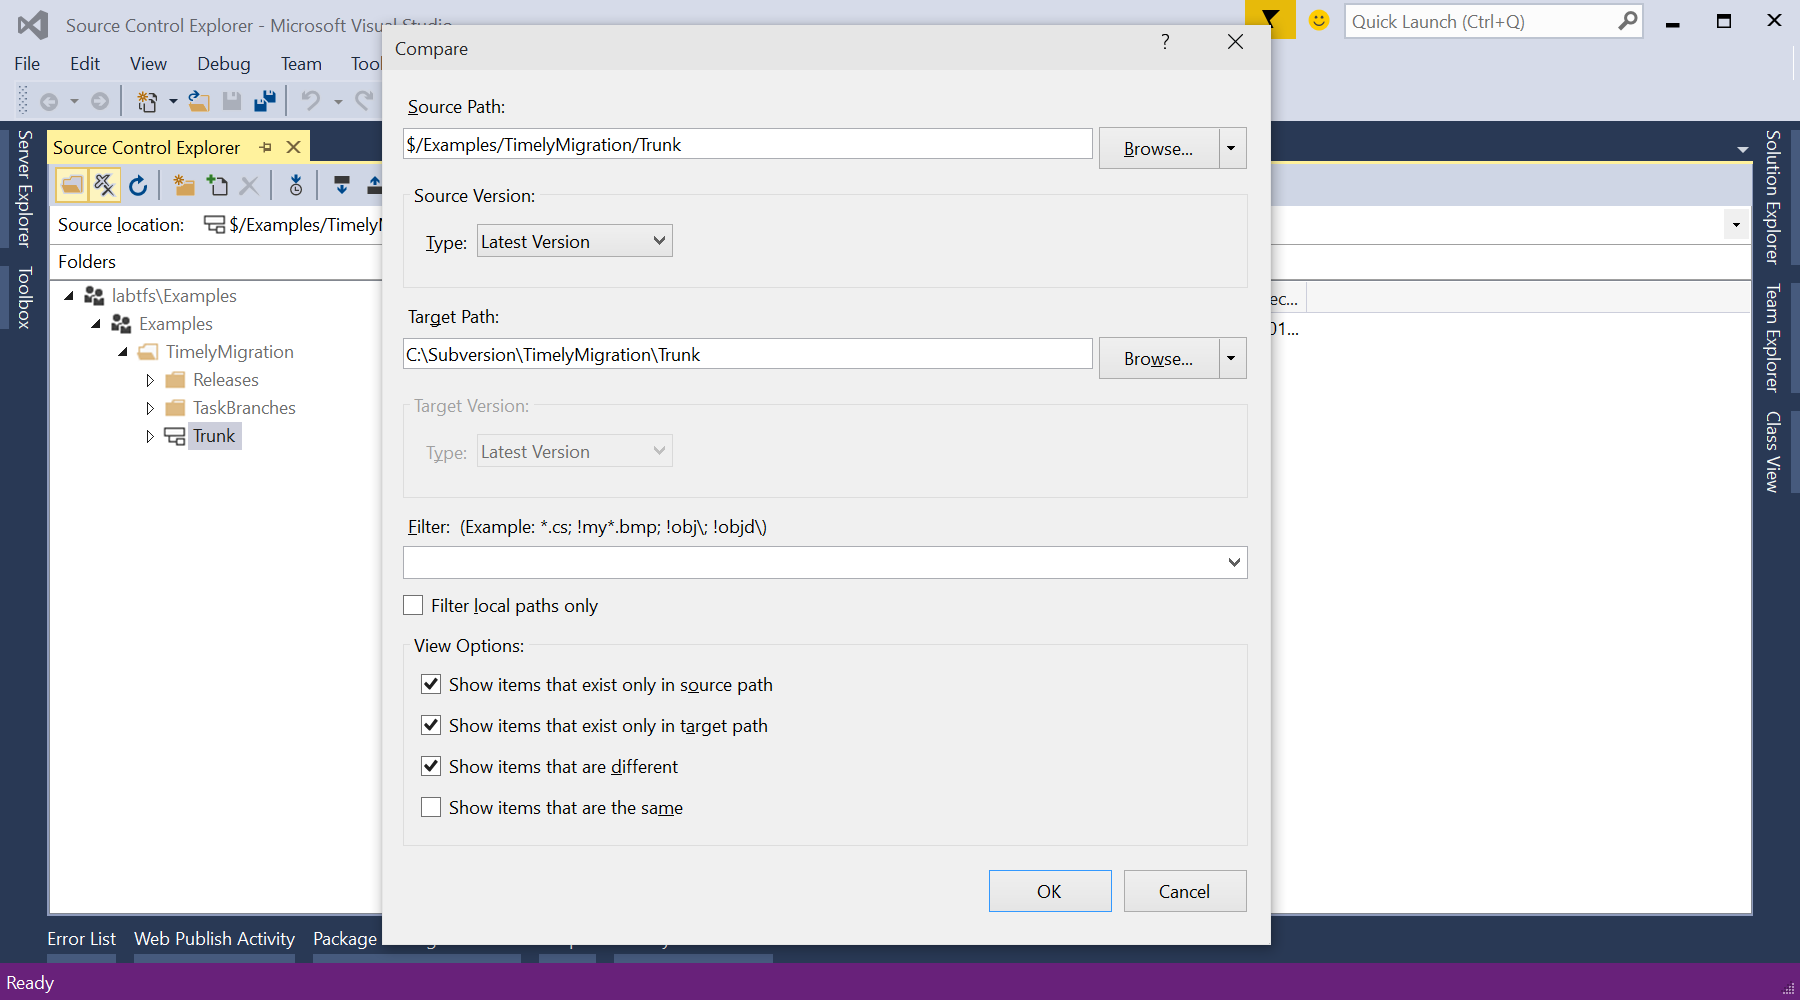
The most basic form of validation is comparing the tips of each of the branches in the source tree which can be performed using the Source Control Explorer window by using the "Compare" option when right clicking on the folder you are interested in validating.
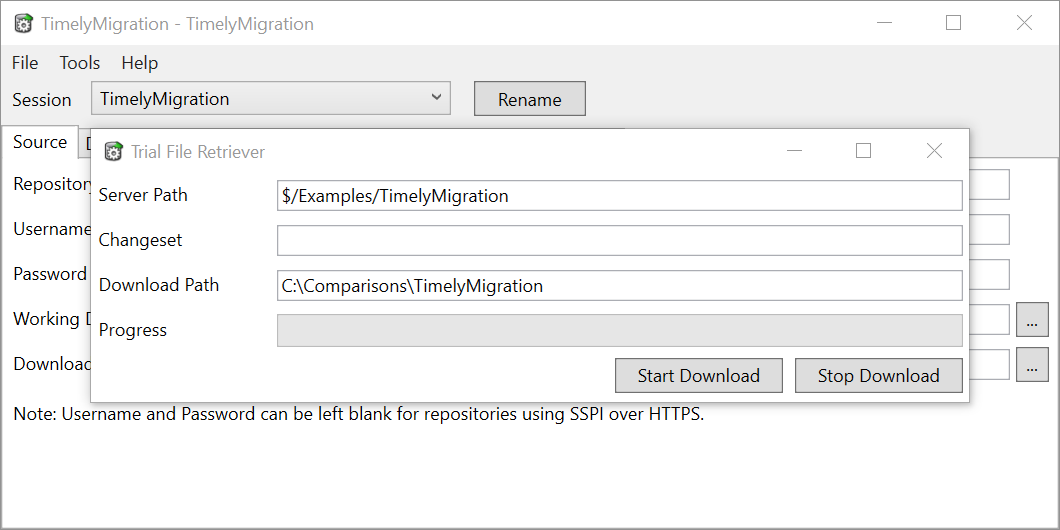
If you are using a trial version of Timely Migration the files checked into TFS will have their contents substituted with revision information for the files that will be migrated by the retail product. This will prevent a direct comparison of the files. To enable comparisons, a utility is provided that will retrieve files based on the revision information in the TFS placeholder files and save them to the local disk.
To use the utility, navigate to the Tools -> Trial File Retriever menu item. Then enter the path in TFS that you would like to download files from and the local folder to place the files in. The changeset field is optional and can be used to validate historical revision content.
Label Comparisons
Label comparison is similar to tip comparison, but performed at certain points in time based on labels or tags that were applied to the source tree. Depending on your labeling strategy and how many builds have been performed testing every label can be impractical. To cut down on the number of comparisons, you can focus on labels that correspond to points where the source was branched.
Viewing labels in TFS can differ from other systems in that if you use the History pane to search for labels, you need to make sure that "View History" is performed on an item that is labeled.
Additionally as compared to SVN, the version shown for folders is the changeset the folder was added in, not the latest changeset of any child items. To see the details of file level changesets within a label you would need to right click the label and select "Edit Label".
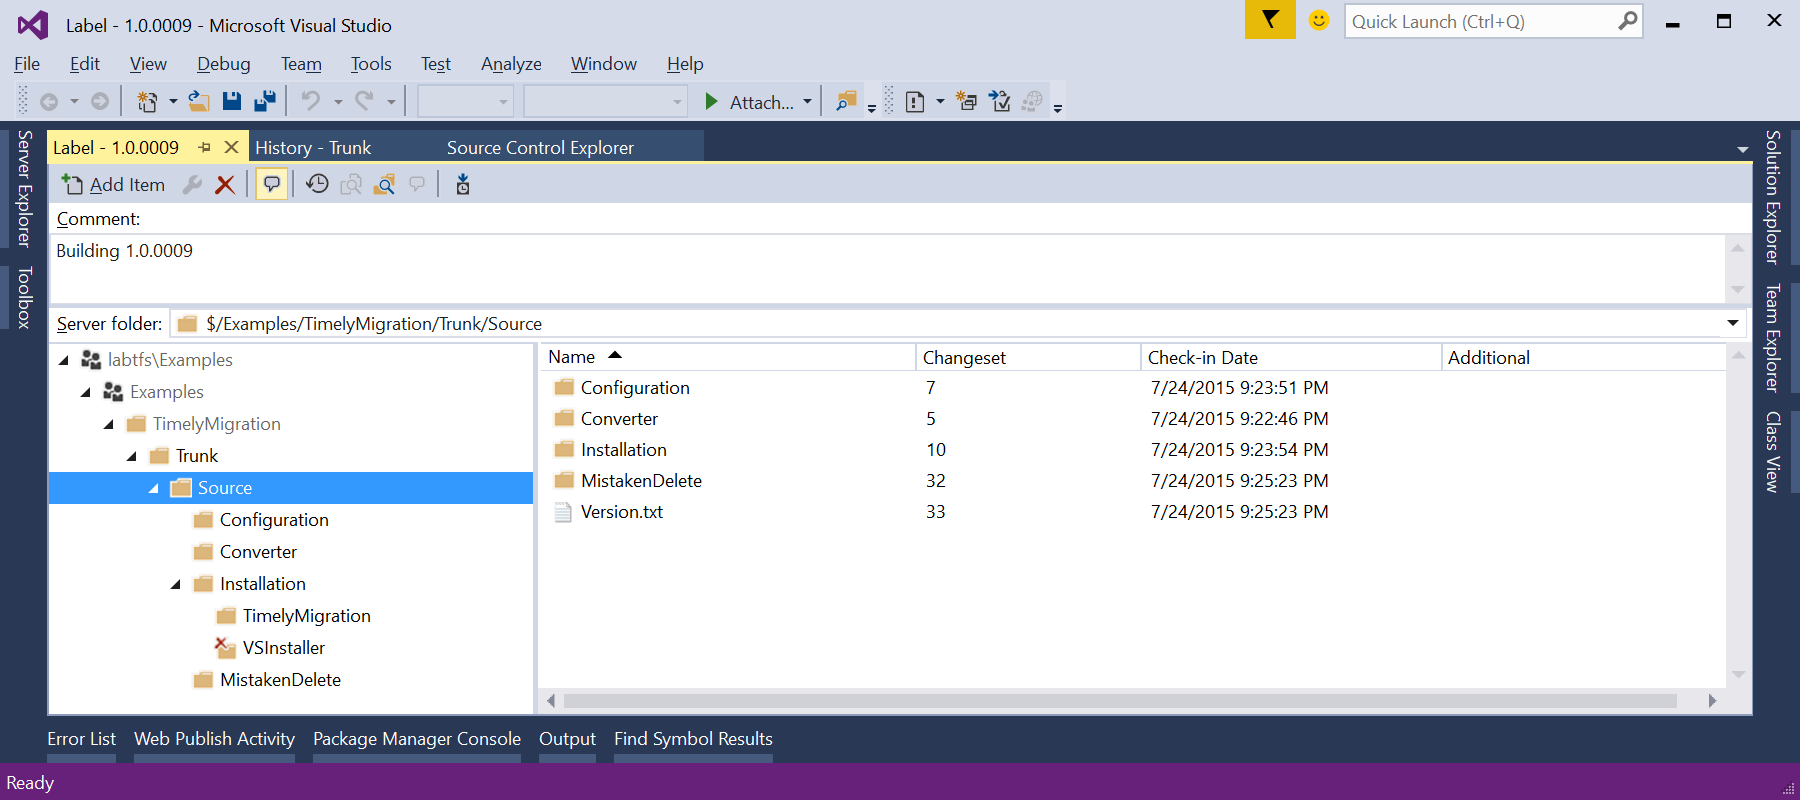
For labels that are not found, it is a good idea to use the "Find -> Find Labels..." dialog to check for the existence of the labels in case it was applied at a different level than you expected.
File Revision Count Comparisons
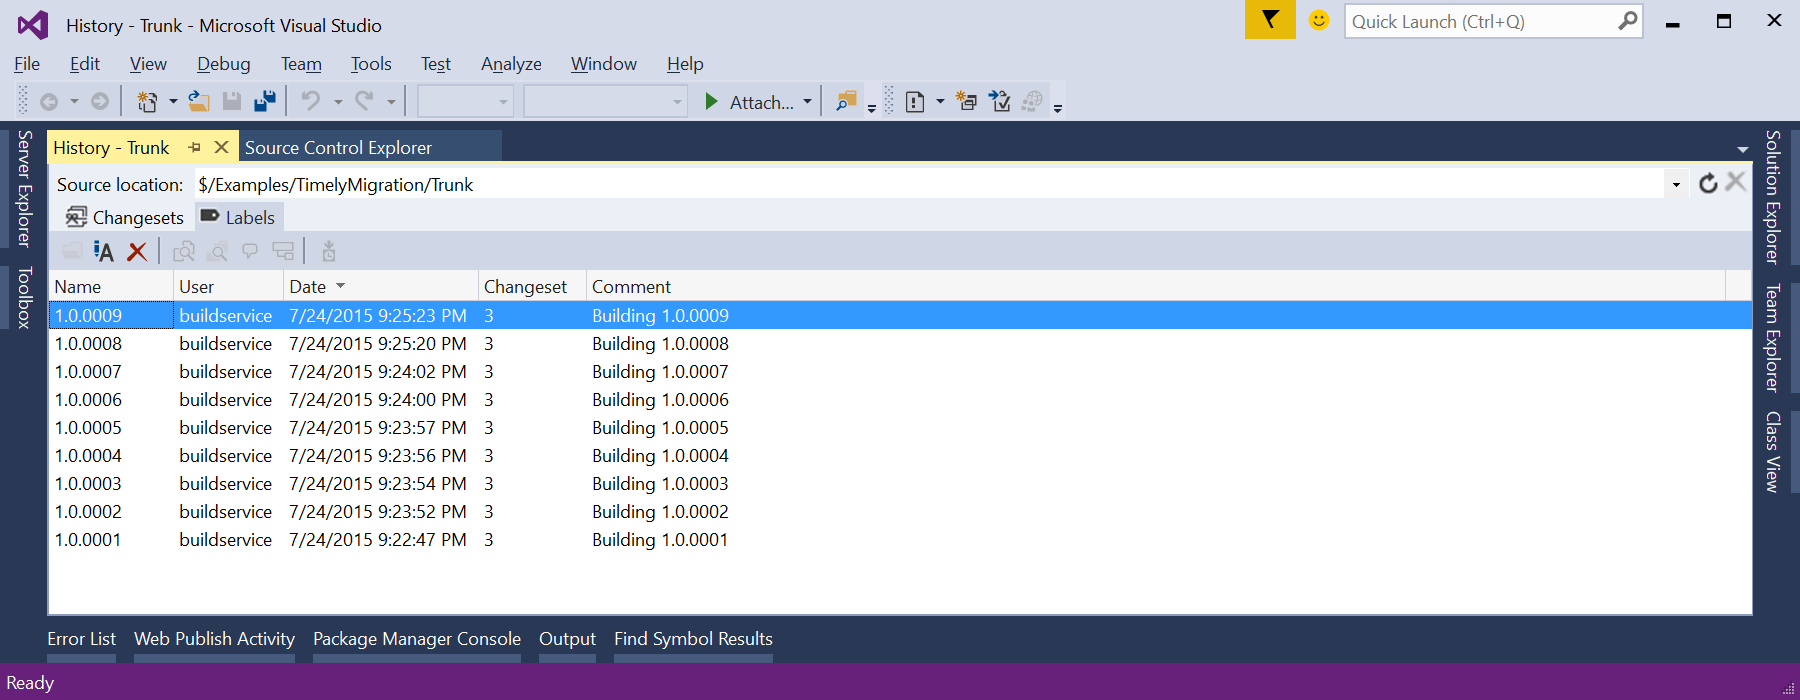
With TFS revisions are based off a global sequence number and not file revision numbers. If the origin source control database uses revision numbers, you can still spot check individual files to validate that revision counts match up. To do this go to the Team Foundation Client and right click on the file you want to compare and select "View History" to populate the "History" pane as shown below.
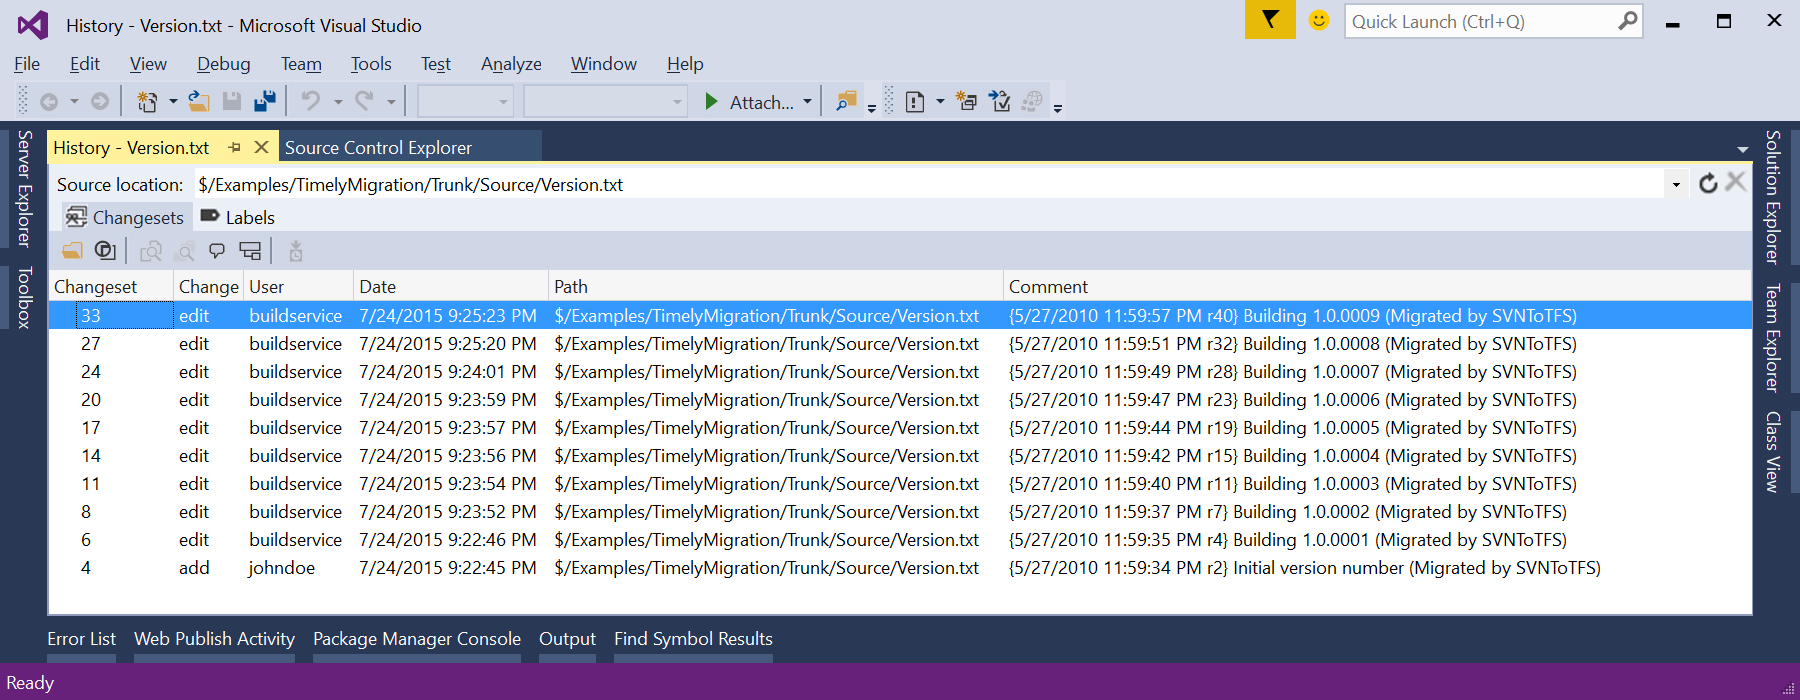
Once the pane is populated, you can highlight all of the entries and copy them into Excel as shown below. The changeset number will go into column A of your spreadsheet and you can resort on column A and the row numbers will become roughly equal to the revision numbers in the origin source database. Note that some operations such as adding a deleted file in CVS may translate to adding a file and then deleting the file with Team Foundation Server, so it may be valid for the revision counts to not match.
Annotate
Annotate, which is similar to CVS blame, marks up a source file with notes about the revision where individual lines were introduced. This can be used as a rough estimate to see how far back history goes. In contrast to comparing file revision counts, this gives you an idea about whether or not you have the content of all revisions of the file.
Certain sections of code such as comments and include statements at the top of files rarely change. By checking to see whether the changesets associated with these sections appear to be the among the earliest changesets for the file, you can get a feel for whether or not the content goes back to the beginning of the file. If there is a problem with retrieving the file from the origin source database, a blank file revision may be checked in for the problem revisions. This would cause the early comments to appear as if they were added in the middle or end of the file’s history.
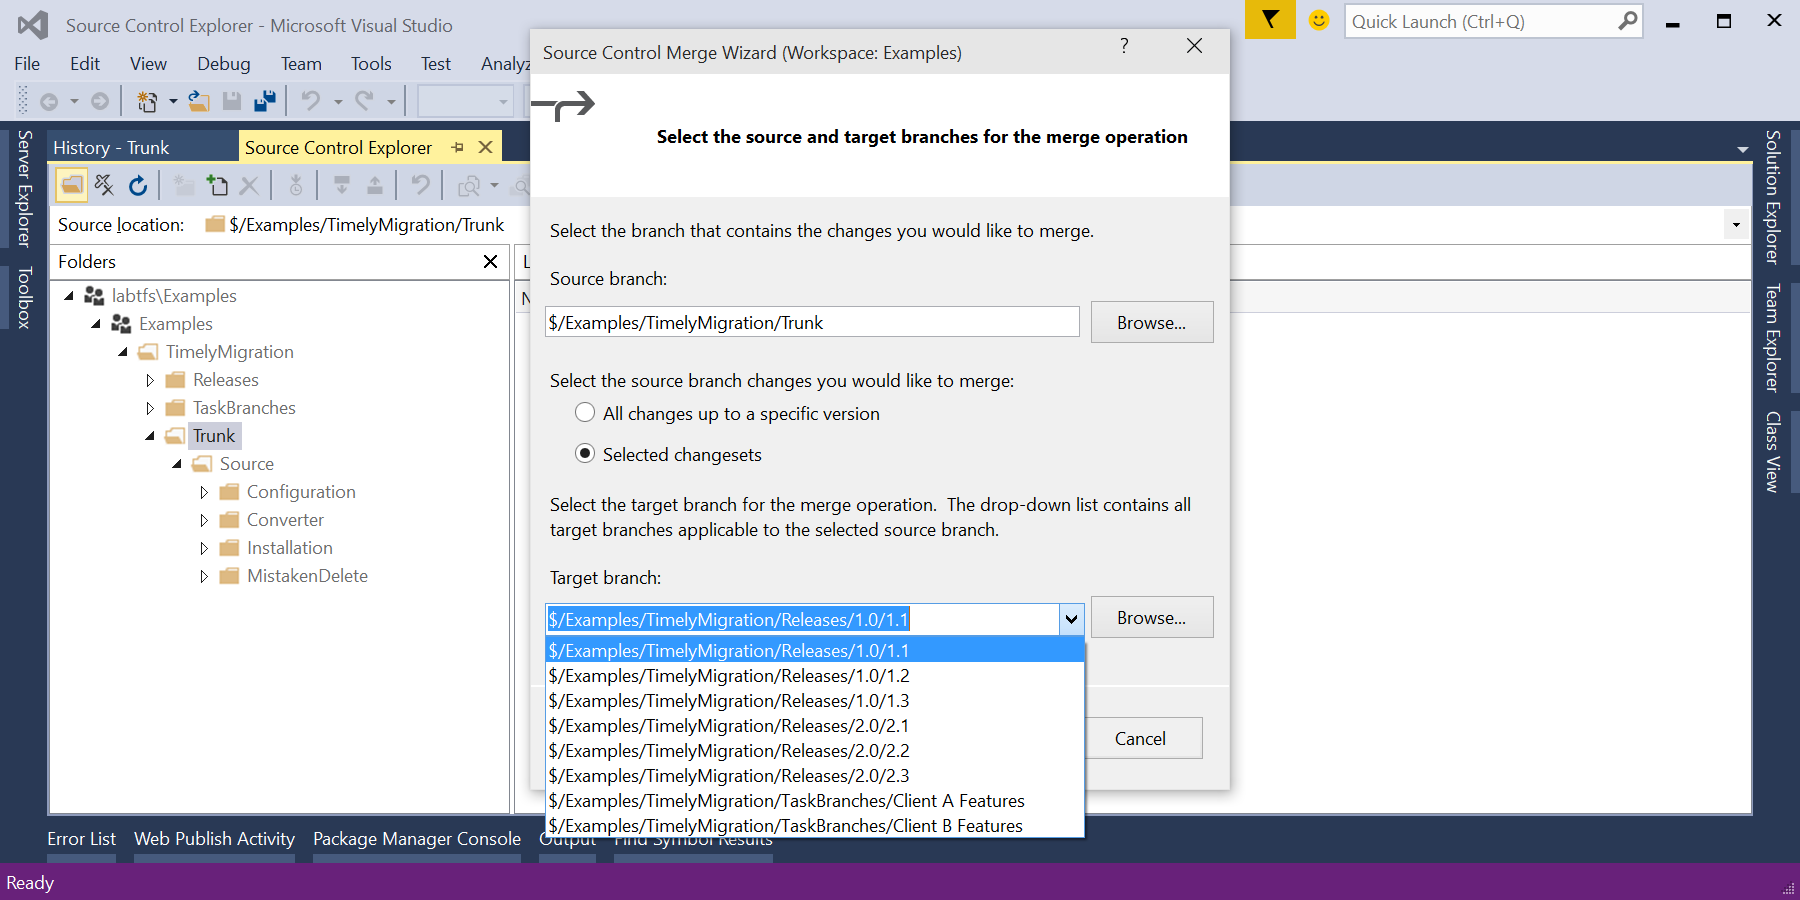
Branch Relationships
If the main development and release branches are being migrated, the branch relationship between the various branches should be validated that so that the built in TFS merging functionalty can be used. This can be tested from the Source Control Explorer window by selecting a file in the main development branch, right clicking on it and selecting "Branching and Merging -> Merge" which will bring up the Source Control Merge Wizard shown below. From there expand the "Target branch" drop down and validate that you see entries for the associated release branches that were migrated.
The branch relationships on individual items can also be verified by right click on and item, selecting "Advanced -> Properties" and then selecting the "Branches" tab.
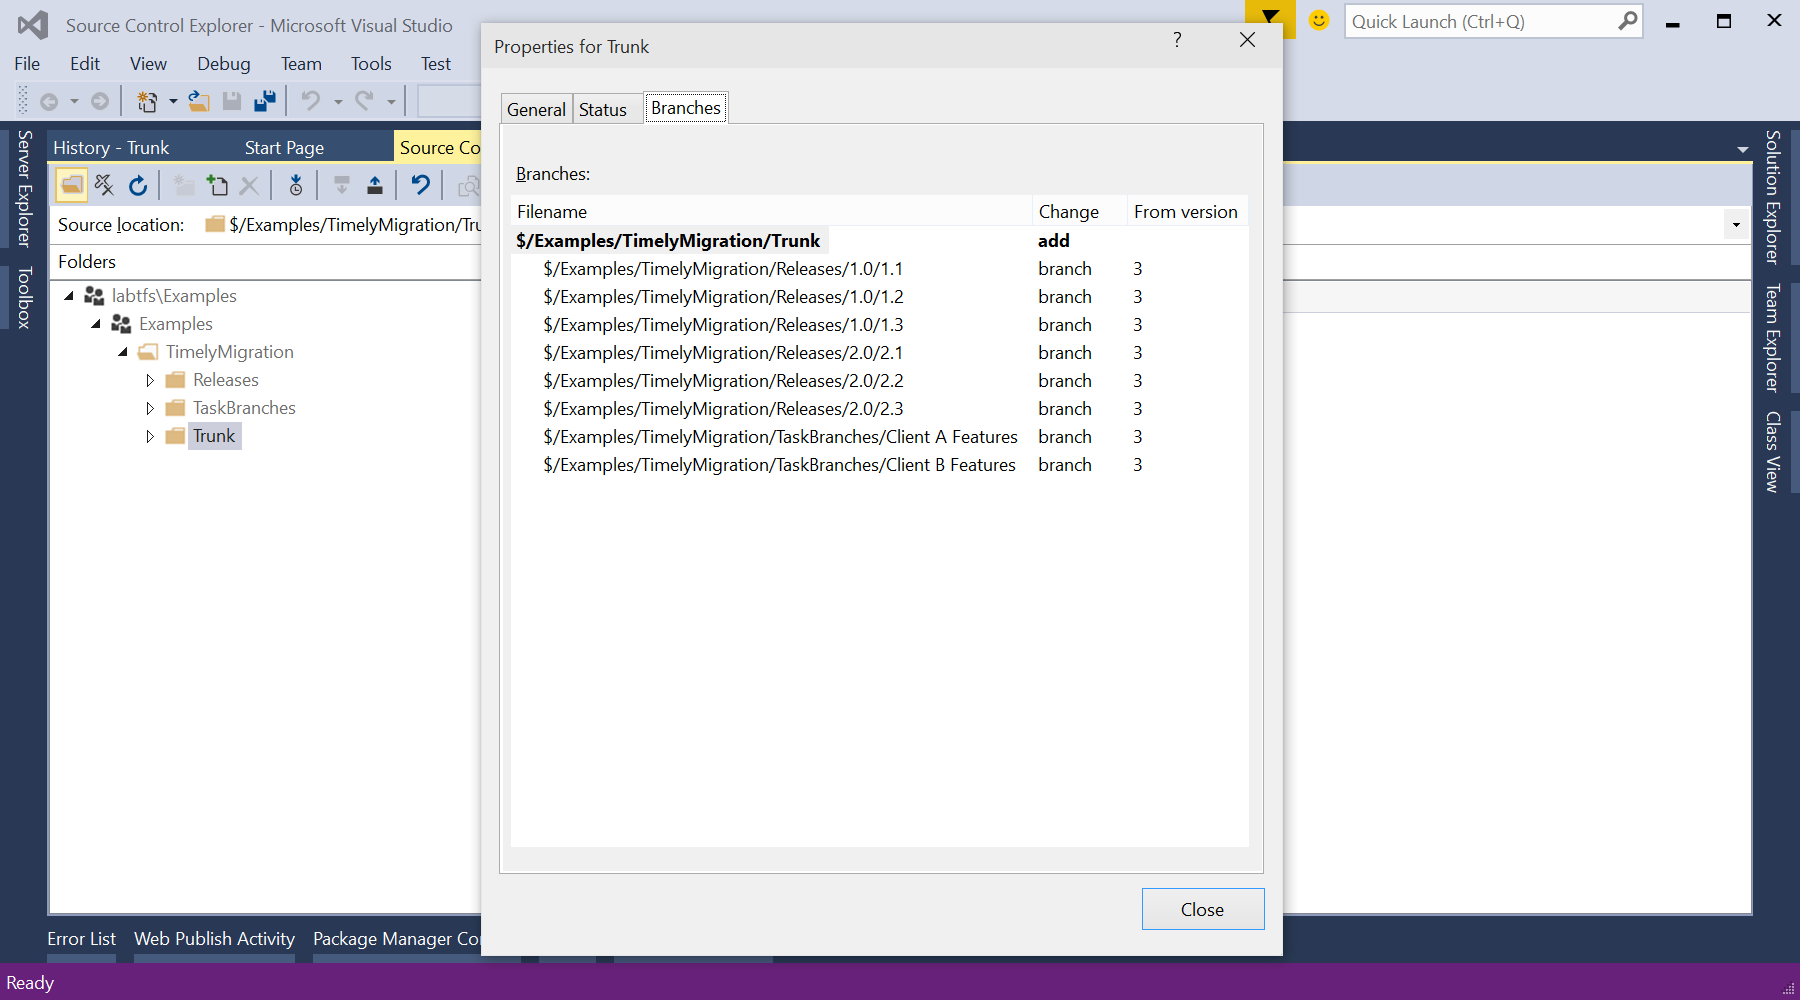
Note that TFS Branch Visualization which is typically indicated by the special folder icon in the TFS UI is different than branch relationships. Branch Visualization lets you track a changeset and where it has been merged to and is initiated from a History window. Branch Visualization adds more restrictions on what operations can be performed between branches which can cause problems with certain change combinations that might be migrated over. Because of the restrictions, enabling Branch Visualization is left as a step that is performed in the TFS UI after finishing all migrations into the destination source tree. This can be performed by going to the Source Control Explorer window, selecting the folder for trunk, right clicking on it and selecting "Branching and Merging -> Convert To Branch".